Domain Pointing : #
Ensure your domain or subdomain is configured with either a CNAME pointing to my.mecard.my OR and an A record pointing 34.87.158.168
CNAME #
If your domain or subdomain is ‘card.yourdomain.com’ , the CNAME should be named ‘card’ and point to ‘my.mecard.my’

A Record #
If your domain or subdomain is ‘card.yourdomain.com’ , the A record should be named ‘card’ and point to 34.87.158.168

Please allow up to 24 hours for DNS changes to propagate fully across all servers worldwide.
Domain Setup : #
Add your domain or subdomain at Domain Setup section.
Input your domain or subdomain example: ‘card.yourdomain.com’ without adding ‘https://’, ‘www.’, or ‘/’ in the Your Custom Domain field.
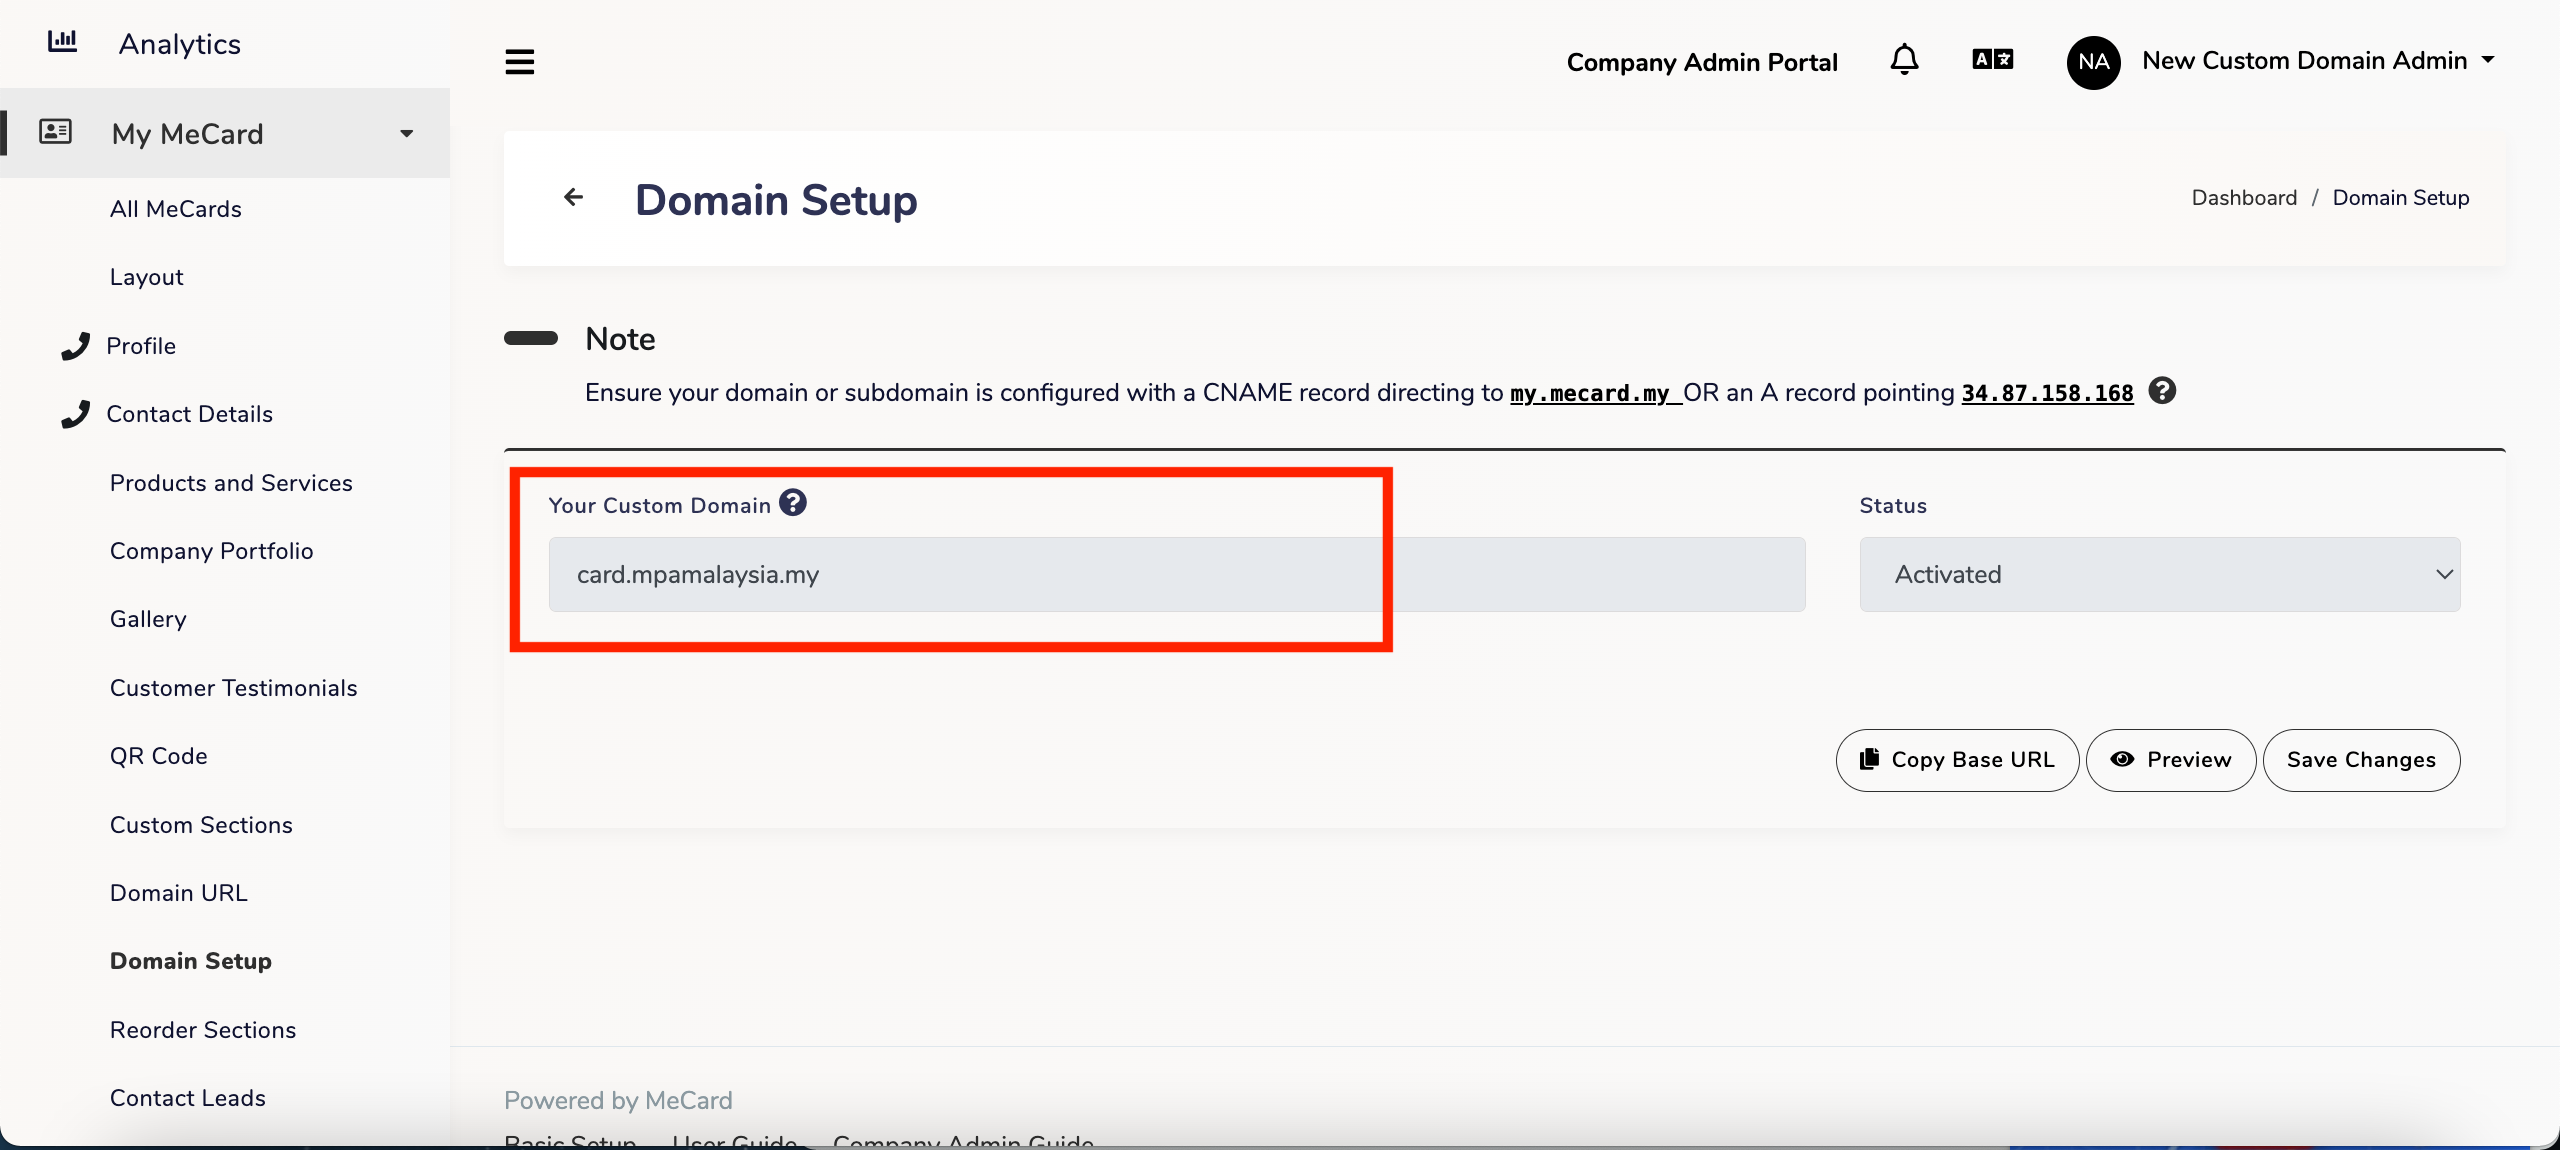
The MeCard team will review and approve your custom domain request.
Once the updates are completed on MeCard end, the Status will change from ‘Deactivated‘ to ‘Activated‘.
Domain URL : #
Select a team member and enter their Domain Slug (e.g., member1) at Domain URL section.
You can enable the option to “Redirect my card to this Domain URL” to seamlessly redirect your Base URL to your Custom Domain URL.
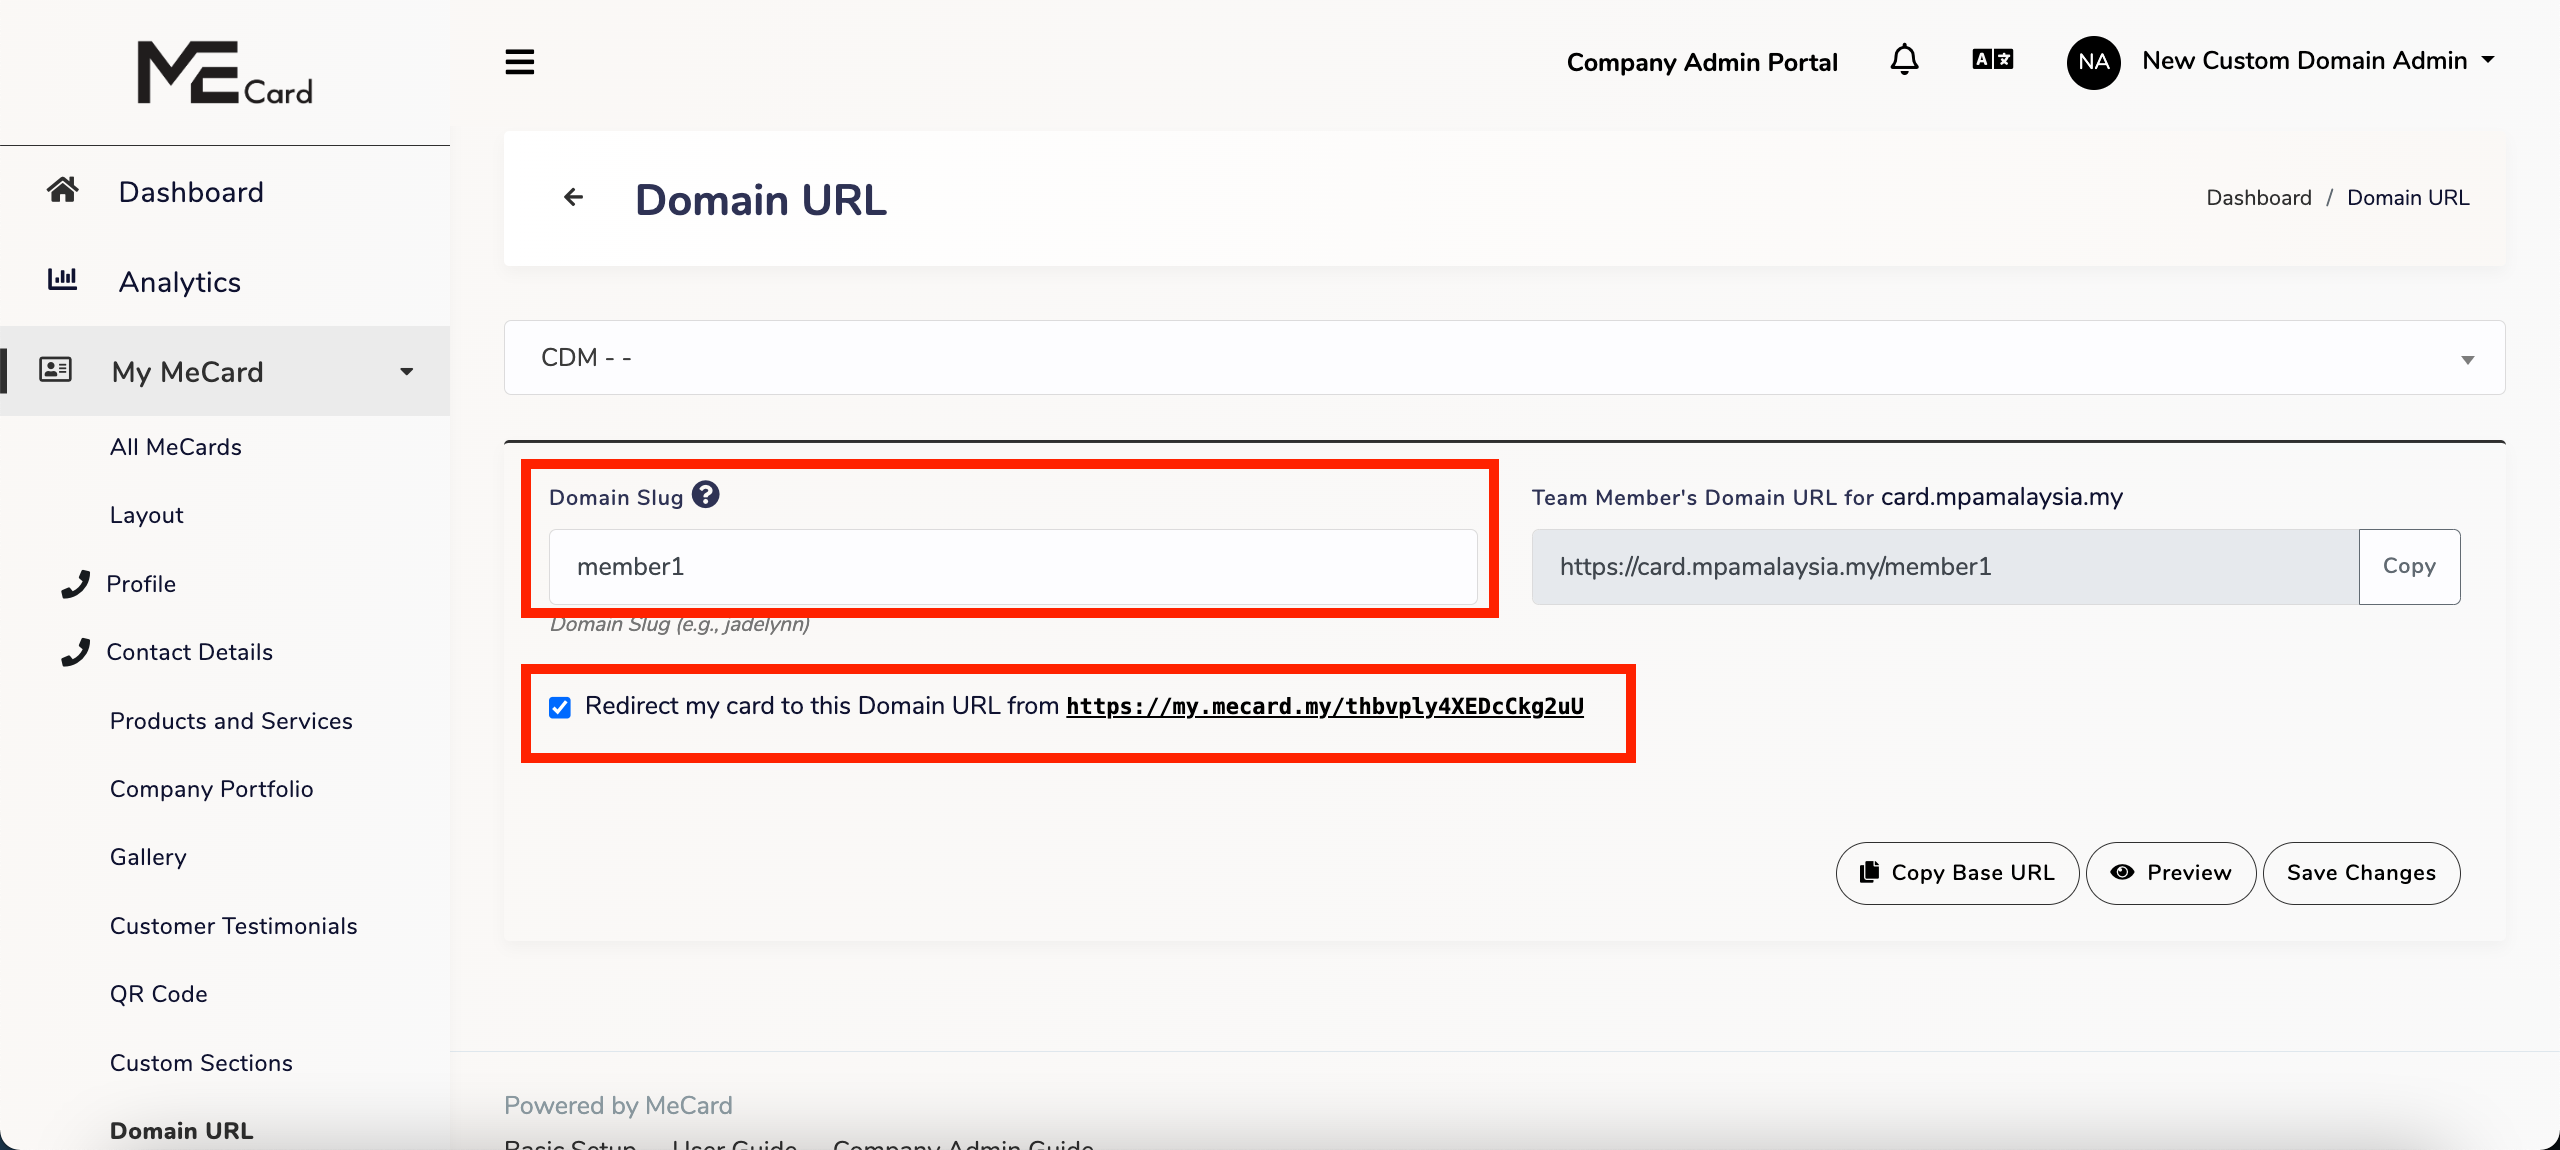
Click Save Changes to set your team member’s Custom Domain URL successfully.
Bulk setup Domain URL : #
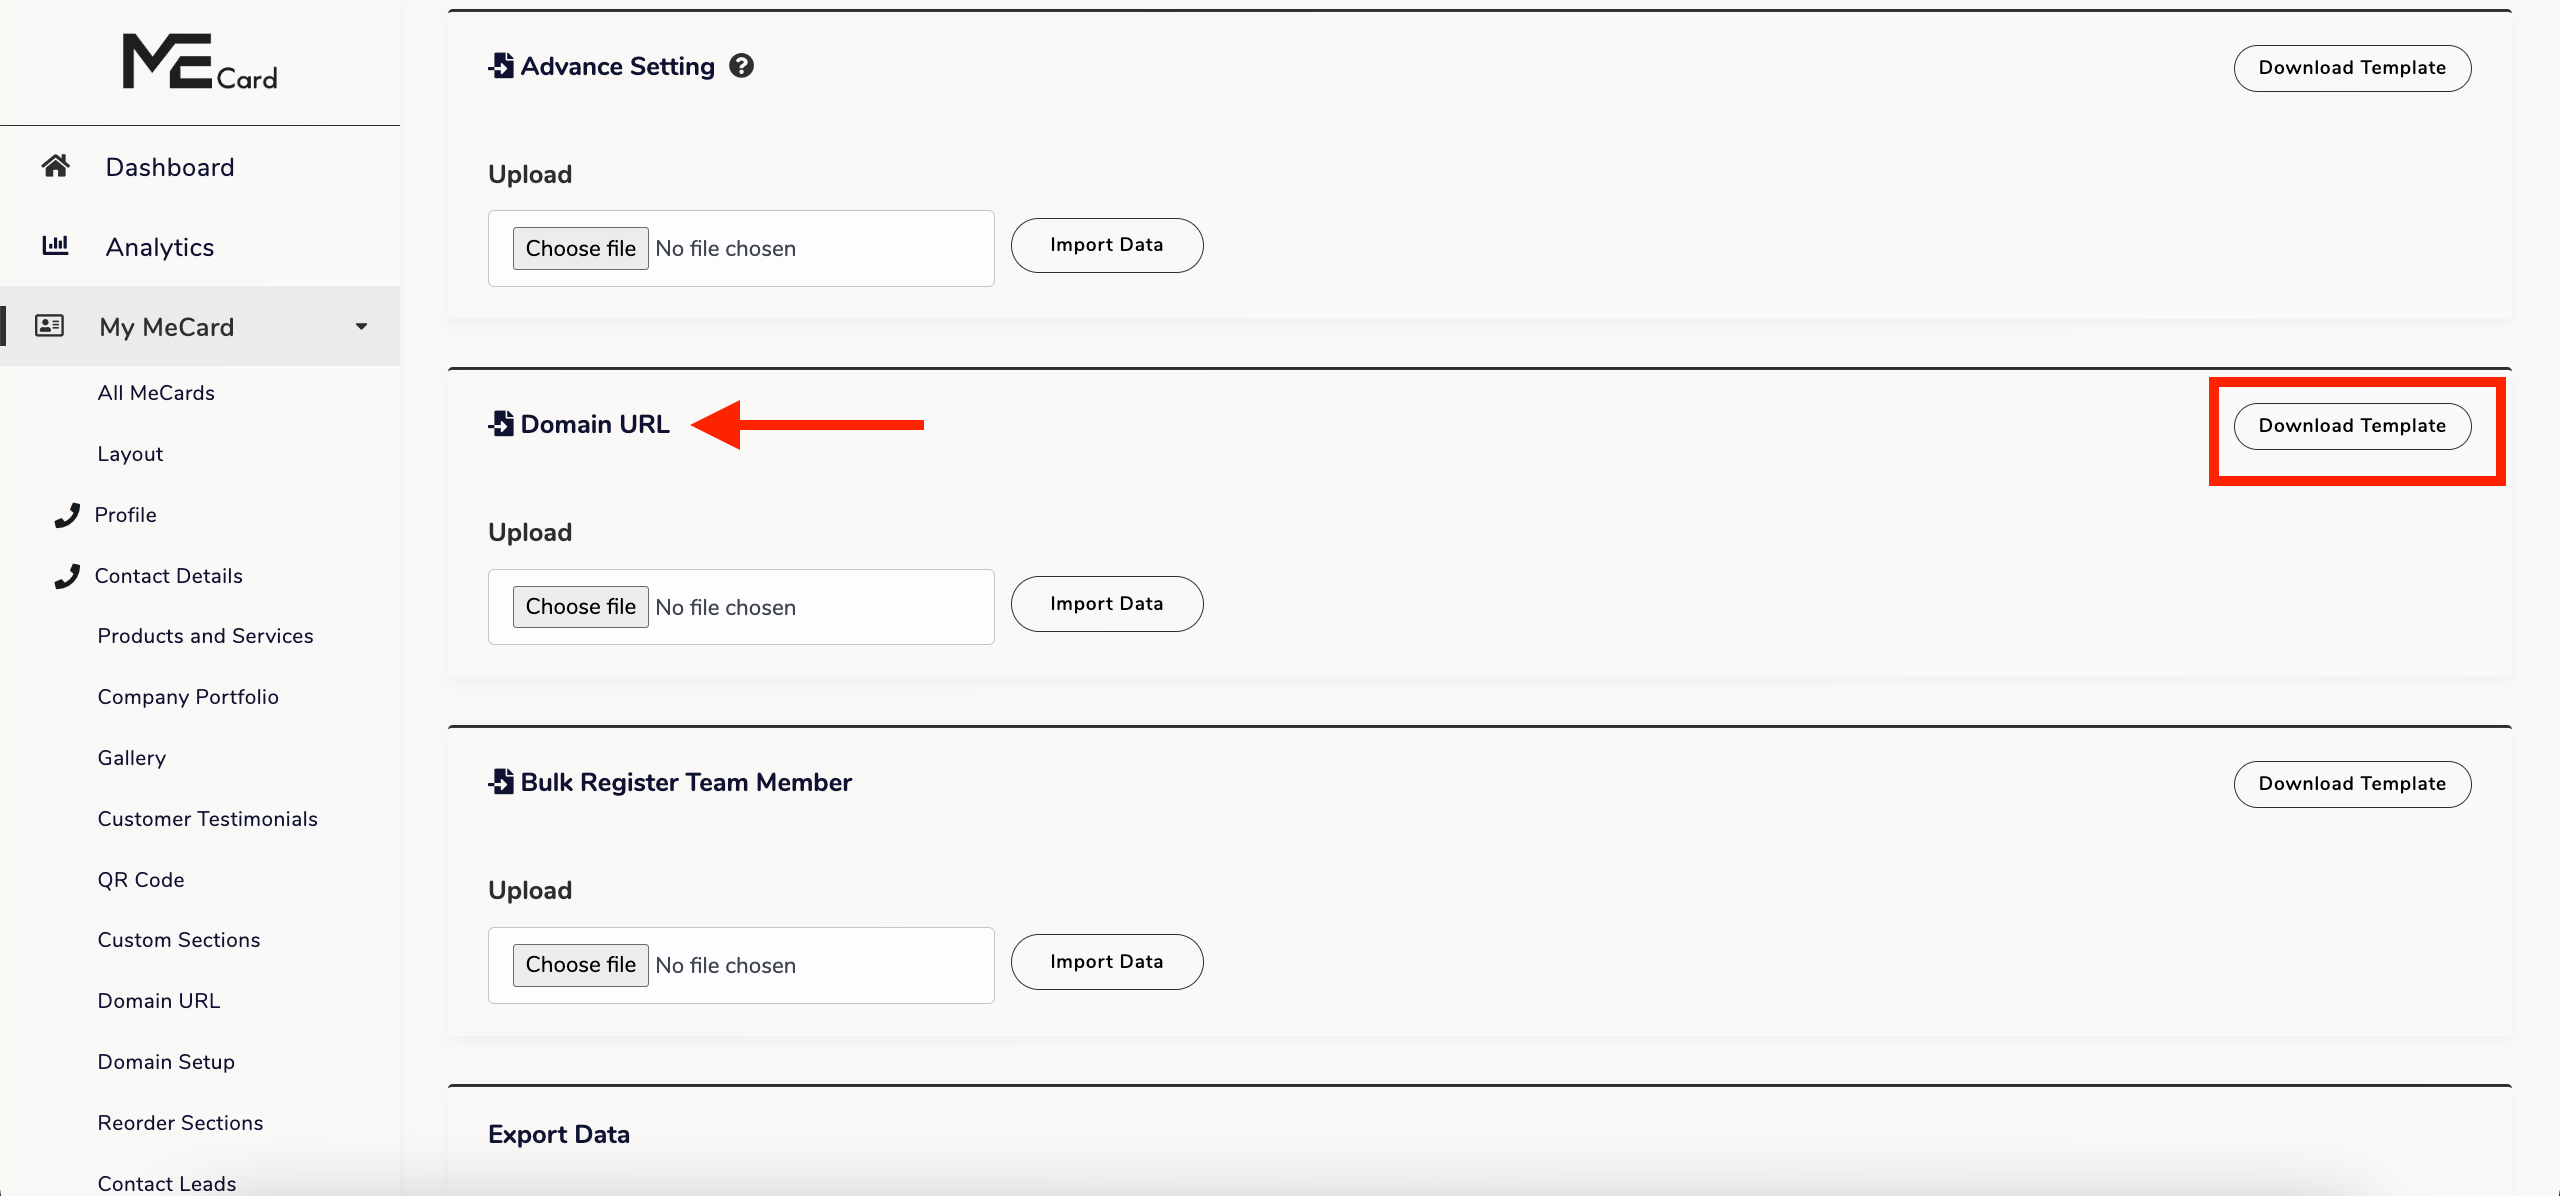
To set up Domain URLs in bulk for your team members, go to the Import Export section, navigate to Domain URL, and click Download Template (A CSV template will be downloaded.)
- Open the downloaded CSV template.
- Enter a Custom Slug {{custom_slug}} to set your team member’s domain URL. For example, entering ‘jadelynn’ will create a URL like
yourdomain/jadelynn. - Enter ‘on‘ to enable redirection from the base URL to your custom domain URL, or ‘off‘ to disable redirection for Custom Domain Redirect {{custom_domain_redirect}}
- When finished, save the file in .csv format.
| Header | ID {{id}} | User ID {{user_id}} | Admin Id {{saas_id}} | Name {{first_name}} | Last Name {{last_name}} | Custom Domain Redirect {{custom_domain_redirect}} | Custom Slug {{custom_slug}} |
|---|---|---|---|---|---|---|---|
| Description | User identification data. Do not edit | User identification data. Do not edit | User identification data. Do not edit | User identification data. Do not edit | User identification data. Do not edit | off / on | Your domain URL (eg.jadelynn) |
Upload Data : #
- Go to the Import Export section, navigate to Domain URL
- Click on the “Choose file” button.
- Select the CSV file that contains the updated data.
- Confirm and complete the upload by click Import Data.
